
If you want cinematic, precise, and creative AI-generated videos, mastering prompt writing for โอเพ่นเอไอ โซรา 2 is essential.
This guide will show you exactly how to structure, optimize, and iterate prompts, balancing tight creative control with Sora’s generative imagination.
By combining clear visual cues, detailed cinematography settings, and deliberate scene actions, you’ll maximize Sora’s ability to deliver the shot you envision — every time.
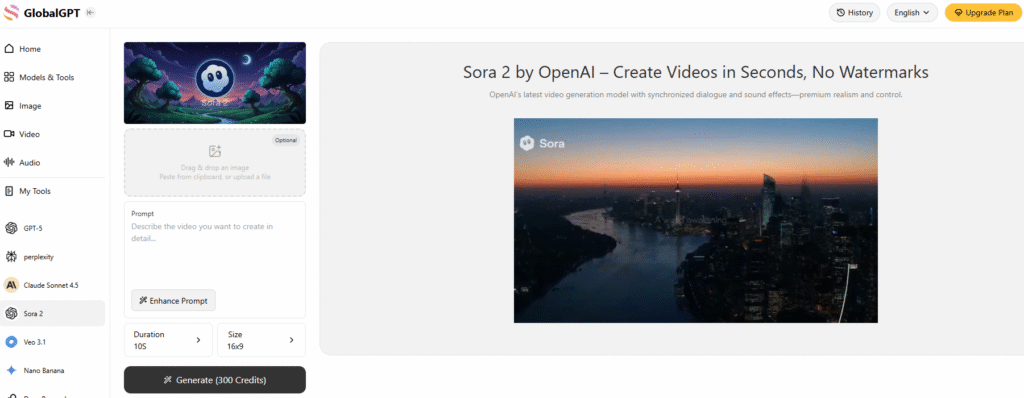
Access to โซระ 2 still ต้องใช้รหัสเชิญ at the moment. But don’t worry — โกลบอล จีพีที has already integrated Sora, so you can explore and use it freely without needing an invite code.
Global GPT ในปัจจุบัน ผสานรวม Sora 2 Pro, ซึ่งสามารถ สร้างวิดีโอได้ยาวสูงสุด 25 วินาที. โดยปกติแล้ว Sora 2 Pro จะมีให้เฉพาะผู้ใช้ที่มี $200/เดือน การสมัครสมาชิก ChatGPT Pro, แต่ด้วย Global GPT คุณสามารถใช้มันได้ โดยไม่มีค่าสมัครสมาชิกราคาแพง.
What Is a Sora 2 Prompt and Why It Matters
A Sora 2 prompt is a set of instructions you provide to OpenAI’s Sora 2 to generate AI videos. A Sora 2 prompt is like briefing a cinematographer who has never seen your storyboard. It’s your creative blueprint: describing shot composition, lighting, movement, sound, and atmosphere.
A clear, well-structured prompt ensures visually accurate, cinematic, and stylistically consistent results.
Example: Instead of “Film a sunrise”, write “Slow pan across a misty valley at dawn, with sunlight breaking through fog into soft golden haze” — this locks in ambience and realism.
Core Principles for Writing Effective Sora 2 Prompts
Effective Sora 2 prompts act like a cinematographer’s storyboard. The core principles include:
- Detailed prompts: Lock in style, color palette, and scene continuity for predictable results.
- Concise prompts: Allow Sora 2 creative freedom for dynamic or imaginative shots.
- Iterative refinement: Generate, review, tweak, and repeat — building a feedback loop that improves video quality.
Example: A detailed prompt specifying a character’s motion, lighting, and sound will produce more precise results than a vague “make it cinematic” command.
For complex cinematic shots, you can go beyond the standard prompt structure and specify the look, camera setup, grading, soundscape, and even shot rationale in professional production terms (similar to how a director briefs a camera crew).
API Parameters You Must Set Outside the Prompt
These cannot be inferred from text — set them explicitly when calling the API:
- model:
sora-2หรือsora-2-pro. - size: a string in the form {width}x{height}. Supported resolutions are dependent on the model selection:
- sora-2
- 1280×720, 720×1280
- sora-2-pro
- 1280×720, 720×1280
- 1024×1792, 1792×1024
- sora-2
- seconds: the clip length, supported values: “4”, “8”, “12”. Default value is “4”.
Efficient Sora 2 Prompt Structure and Writing Techniques
Basic Structure: Define the Core Elements
Think of each prompt as a modular creative block, typically including:
- Scene & Subject
– Specify setting, time, atmosphere, characters, and props. - Camera Framing & Motion
– Mention lens type, angle, depth of field, and ONE camera movement. - Action Breakdown
– ONE clear subject action, described in beats or counts. - Lighting & Color Anchors
– State light source, quality, direction, and 3–5 color tones. - Dialogue & Audio
– Separate from visuals; keep concise to match clip length. - Shot Segmentation (for multi-scene prompts)
– Outline one camera setup, one subject action, and one lighting recipe per segment.
Prompt Example — Short & Flexible
Scene:
In a 1990s documentary-style interview, an elderly Swedish man sits in his study and says, “I still remember when I was young.”
Camera:
Medium shot, static. Slightly shallow depth of field. Natural warm morning light.
Action:
The man leans forward, hands clasped, eyes fixed on the desk.
Dialogue:
“I still remember when I was young.”
Prompt Example — Ultra-Detailed Cinematic Shot
Format & Look
Duration 4s; 180° shutter; digital capture emulating 65 mm photochemical contrast; fine grain; subtle halation on speculars; no gate weave.
Lenses & Filtration
32 mm / 50 mm spherical primes; Black Pro-Mist 1/4; slight CPL rotation to manage glass reflections on train windows.
Grade / Palette
Highlights: clean morning sunlight with amber lift.
Mids: balanced neutrals with slight teal cast in shadows.
Blacks: soft, neutral with mild lift for haze retention.
Lighting & Atmosphere
Natural sunlight from camera left, low angle (07:30 AM).
Bounce: 4×4 ultrabounce silver from trackside.
Negative fill from opposite wall.
Practical: sodium platform lights on dim fade.
Atmos: gentle mist; train exhaust drift through light beam.
Location & Framing
Urban commuter platform, dawn.
Foreground: yellow safety line, coffee cup on bench.
Midground: waiting passengers silhouetted in haze.
Background: arriving train braking to a stop.
Avoid signage or corporate branding.
Wardrobe / Props / Extras
Main subject: mid-30s traveler, navy coat, backpack slung on one shoulder, holding phone loosely at side.
Extras: commuters in muted tones; one cyclist pushing bike.
Props: paper coffee cup, rolling luggage, LED departure board (generic destinations).
Sound
Diegetic only: faint rail screech, train brakes hiss, distant announcement muffled (-20 LUFS), low ambient hum.
Footsteps and paper rustle; no score or added foley.
Optimized Shot List (2 shots / 4 s total)
0.00–2.40 — “Arrival Drift” (32 mm, shoulder-mounted slow dolly left)
Camera slides past platform signage edge; shallow focus reveals traveler mid-frame looking down tracks. Morning light blooms across lens; train headlights flare softly through mist. Purpose: establish setting and tone, hint anticipation.
2.40–4.00 — “Turn and Pause” (50 mm, slow arc in)
Cut to tighter over-shoulder arc as train halts; traveler turns slightly toward camera, catching sunlight rim across cheek and phone screen reflection. Eyes flick up toward something unseen. Purpose: create human focal moment with minimal motion.
Camera Notes (Why It Reads)
Keep eyeline low and close to lens axis for intimacy.
Allow micro flares from train glass as aesthetic texture.
Preserve subtle handheld imperfection for realism.
Do not break silhouette clarity with overexposed flare; retain skin highlight roll-off.
Finishing
Fine-grain overlay with mild chroma noise for realism; restrained halation on practicals; warm-cool LUT for morning split tone.
Mix: prioritize train and ambient detail over footstep transients.
Poster frame: traveler mid-turn, golden rim light, arriving train soft-focus in background haze.
Key Optimization Techniques for Sora 2 Prompts
Use Visual Cues to Define Style
Style is the most powerful lever when guiding Sora 2’s interpretation. Establish your desired aesthetic early and avoid vague descriptions.
| Weak prompt | Strong prompt |
| “A beautiful street at night” | “Wet asphalt, zebra crosswalk, neon signs reflecting in puddles” |
| “Person moves quickly” | “Cyclist pedals three times, brakes, and stops at crosswalk” |
| “Cinematic look” | “Anamorphic 2.0x lens, shallow DOF, volumetric light” |
Specific visual cues like lens type, atmosphere, and lighting behavior help Sora 2 deliver consistent cinematic realism instead of generic visuals.
Some examples for good framing instructions:
- wide establishing shot, eye level
- wide shot, tracking left to right with the charge
- aerial wide shot, slight downward angle
- medium close-up shot, slight angle from behind
Some examples for good camera motion instructions:
- slowly tilting camera
- handheld eng camera
Precisely Control Action and Timing
Each shot should include only one camera movement and one subject action. Describe timing using beats or counts to maintain rhythm and realism.
| Weak prompt | Strong prompt |
| “The actor walks across the room.” | “The actor walks four steps toward the window, pauses, then closes the curtain in the final second.” |
This approach ensures Sora 2 maintains clean motion transitions and temporal accuracy across generated frames.
Maintain Lighting and Color Consistency
Lighting defines emotion. Always specify the light source และ color anchors (3–5 hues) to preserve tonal harmony across scenes. This ensures seamless transitions during editing.
| Weak prompt | Strong prompt |
| “A brightly lit room.” | “Soft daylight from the window, complemented by a warm desk lamp and cool edge light from the hallway. Color anchors: amber, cream, walnut brown.” |
By defining key light, fill light, and accent tones, you can make multi-shot Sora 2 videos feel like one cohesive cinematic sequence.
Fine-Tune Composition with Image Inputs
For enhanced control over the visual style and composition of your video, you can use an image as a reference. This approach locks in crucial elements like character design, wardrobe, set dressing, and overall aesthetic. The model uses the image as an anchor for the first frame, while your text prompt continues to guide the sequence.
How to use it:
Include an image file as the input_reference parameter in your POST /videos request.
- Ensure the image matches the target video’s resolution (size).
- Supported file formats are: image/jpeg, image/png, และ image/webp.
Experimentation Tip:
If you don’t already have visual references, OpenAI’s image generation model is an excellent tool for quickly producing environment and scene designs. These images can then be passed into Sora as visual references, helping to test aesthetics and generate beautiful starting points for your videos.
Writing Dialogue and Designing Sound
Keep dialogue concise and separated from the visual description. A 4-second shot typically fits 1–2 short lines. For multi-character scenes, clearly tag each speaker.
Add ambient or rhythmic sound cues for silent clips—these create atmosphere and help Sora 2 simulate natural audio environments.
Example Sora 2 prompt with dialogue:
Scene:
A narrow, windowless room. Gray walls. Bare bulb over a metal table. A detective faces a suspect across the table. Only the faint hum of the light breaks the silence.
Dialogue:
- Detective: “You’re lying. I can hear it in your silence.”
- Suspect: “Maybe I’m just tired of talking.”
- Detective: “Either way, you’ll speak before the night’s over.”
This structure keeps tone and pacing cinematic while giving Sora 2 clear, separated creative signals.
Iterate with the Remix Function
The Remix feature is designed for controlled micro-adjustments, not random experimentation. Use it deliberately to refine composition, tone, or color.
- Define clear change directions: “Same shot, switch to 85mm lens.”
“Same lighting, new color palette: cyan, sand, rust.” - Simplify before expanding:
If a shot fails to render correctly, lock the camera position and simplify actions first. Once successful, gradually add complexity.
This disciplined remix process helps you evolve your Sora 2 prompt efficiently while maintaining creative control.
Sora 2 Prompt Template for Quick Start
Here’s a ready-to-use Sora 2 prompt template for beginners:
| Category | Content |
|---|---|
| Scene Description | A rainy day at a café. A woman in a beige trench coat sits by the window, an unopened letter resting on the table. |
| Cinematography Settings | Camera Shot: Medium close-up, slow push-in Mood: Gentle sense of nostalgia Lighting: Warm yellow table lamp combined with cool reflections from the rain outside. Color anchors: ivory, caramel, dark gray. |
| Actions | – Action 1: The woman runs her fingertips along the edge of the letter. – Action 2: She looks up toward the window as raindrops hit the glass. – Action 3: She softly says, “So it finally came.” |
| Dialogue / Sound Effects | Dialogue: “So it finally came.” Sound Effects: Rainfall, the gentle clinking of cups and saucers in the café, no background music. |
This structured format helps Sora 2 interpret your instructions accurately, producing consistent, cinematic results.
Final Tips for Sora 2 Prompt Mastery
To help you make the most of โซระ 2, we’ve prepared a complete set of guides — including how to get your invite code, join the invite queue on Discord, and even work around Sora 2’s content restrictions. These step-by-step resources ensure you can explore the full potential of Sora 2 without missing a thing.
- Start simple and build complexity gradually.
- Experiment with camera, lighting, and motion in short clips.
- Track all prompts and iterations to refine your workflow.
- Always respect content guidelines and consent when using cameos or likenesses.
Following these strategies will ensure your Sora 2 prompts consistently produce cinematic, high-quality AI videos.

